

Section Two
What App Advertisers Need to Do Before They Start Advertising
If you’ve been running Facebook (or Instagram) ads for a while, you may already have the basics set up. If so, jump ahead to the next section, Competitive Analysis and Creative Strategy for Facebook Ads. But if you are among app advertisers just getting started, or you’re launching a brand new account or project, you’ll need to do a few things before you start advertising. Skipping these steps will either literally block you from launching a campaign, or it will impair your ability to track results.
First, you’ll need to:
1. Create a Facebook account (assuming you don’t already have one).
2. Create a Facebook business page (again, assuming you don’t already have a Facebook page for the project you want to advertise).
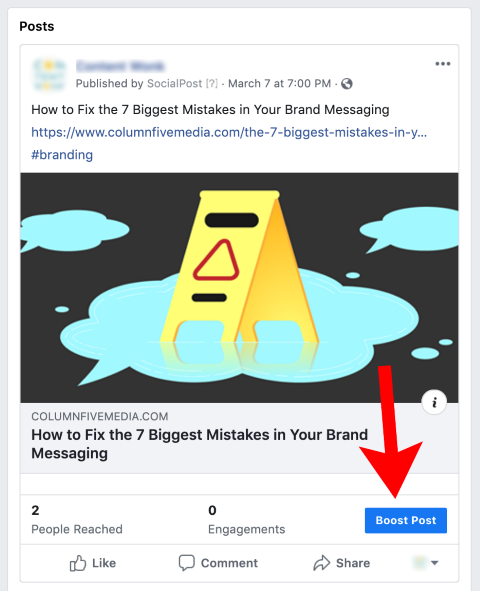
That’s all you’ll need if all you want to do is boost posts from your Facebook page to your existing audience on Facebook. Boosted posts are technically ads, but they don’t have any of the customization features available in Facebook’s Ads Manager. In fact, you’ll need Facebook Ads Manager even if you want to create a post that doesn’t appear on your Page’s timeline or in News Feed.
But boosting posts is simple, which is why so many people do it. Just go to the post you want to boost on your Business page and click the blue “Boost Post” button. Facebook’s interface will guide you through the information required to boost the post. Note that not all posts can be boosted; Facebook’s information page about what can’t be boosted is here.
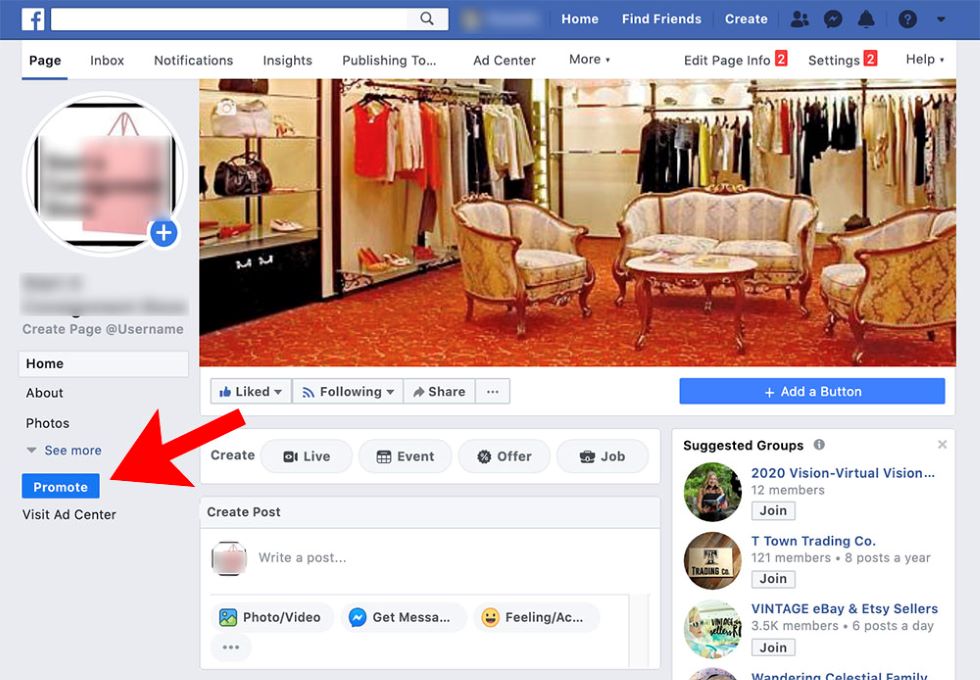
If you’re a local business, you can also promote your business from your Facebook business page. Just click the “Promote” button near the bottom left of your business page, and Facebook’s interface will guide you through all the settings to Promote your business from there.
While boosted posts and business promotion are certainly very easy to use, they are too simplistic for most advertisers, and we generally don’t recommend them. To get far better results from Facebook (and Instagram) ads, you should use Facebook’s Ads Manager. And to do that, you’ll need a Facebook Business page.
Note that you do not need to create an account in Facebook’s Ads Manager. One is automatically created for you when you create a business page.
3. Install the Facebook Pixel.
Before you ever turn on an ad campaign, it’s critical to install the Facebook pixel. If possible, it’s actually best for you to install the Facebook pixel even months before you launch your first campaign. This is because the Facebook pixel can track everyone who comes to your website (or to other apps and tools), so it will allow you to target your ads to people who have been to your website ever since you installed the pixel. Being able to create a custom audience of everyone who’s been to your website in the last six months is a beautiful thing.
Fortunately, installing a Facebook pixel is easy. Just go into the Facebook Ads Manager, click the top-left hamburger menu to the left of “Ads Manager.” A pop-up menu will appear. Choose “Ads Manager” from the selections on the left, then look in the third column of the second pop-up menu under “Measure & Report”. Under “Events Manager,” select “Pixels”.
![]()
Next, you’ll see a screen like this:
![]()
If you click “Set up Pixel”, you’ll be given three options:
Add code using a Partner Integration
Connect your site using one of our many partners including Squarespace, WordPress, Shopify, and others. Learn More
Best for: Sites using a CMS, minimal technical support needed
Manually add pixel code to the website
Follow guided installation instructions with detailed developer documentation. Learn More
Best for: Custom sites, some technical support needed
Email instructions to a developer
If you don’t have direct access to your site’s code, send instructions and documentation to your technical support. Be sure to include the pixel ID in your email.
Best for: No current access to the website codebase
If you’re comfortable working with code (at least enough to copy it and paste it into the right spot), choose “Manually add pixel code to website”. After you select that, Facebook will show you the code you need to add to your website. Note that if you’re using a third-party tool for your Facebook pixel, you would have wanted to pick the first option in the prior screen, “Add code using a Partner Integration.”
![]()
Once you’ve copied the code, paste it into your website’s header area. If your site is on WordPress, there’s a free plugin called “Insert Headers and Footers” which makes this very easy to do.
Once the code is installed, turn on. There are several benefits to Automatic Advanced Matching, including:
- More accurate conversion attribution
- More people in your Website Custom Audience
- Reduced cost per conversions
Note that you can also set up “manual Advanced Matching,” but you’ll need the help of a developer to do it. is also available for app advertisers if you have Facebook SDK set up. More about SDK in a moment.
After you’ve got the Facebook pixel installed and Advanced Matching turned on, then you can tell Facebook specifically what you want to track in the Event Setup Tool. You can also manually edit the pixel code yourself, but the Setup Tool lets you do this without any coding on your part.

Events you might want to track include:
- Leads
- Views
- Orders
Facebook has more information about installing and configuring Facebook pixels here. How you set up your pixel will depend on your business, though the chart below will show you what’s possible for different industries.
![]()
4. Optional: Create a Business Manager account.
If you haven’t created a business manager account yet, it’s a good idea to do it now. You can technically still run ads without a Business Manager account, but a Business Manager account will allow you to:
- Add people to your account (very helpful if you have even a few employees, or an ad agency, or other contractors you work with).
- Attach pages to your Business Manager.
- Add ad accounts to your Business Manager.
For ad agencies and marketing services, in particular, having a Business Manager account is essential. Specifically, agencies and Facebook Marketing Partners (like Consumer Acquisition) can specify which accounts they use on behalf of other businesses. Mobile app advertisers will also want to create a Business Manager account as part of the process of registering their app for mobile app ads.
Business Manager accounts are free and easy to setup. To go to. Click “Create Account” and follow the instructions.
Additional setup tasks for mobile app advertisers
Mobile app advertisers have a couple of extra steps to set up their accounts completely. It is a bit more work, but you’ll be glad you did it.
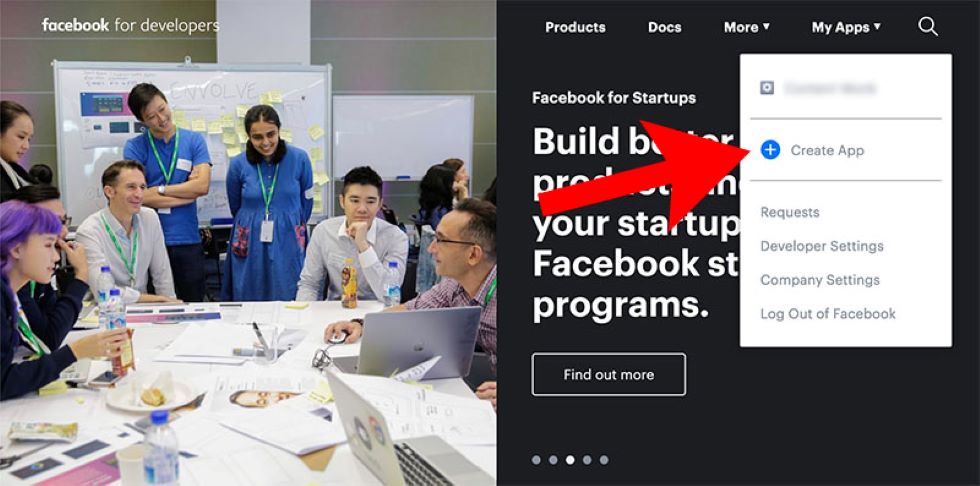
5. Create [or integrate] a Facebook developer account.
Many advertising and marketing tools require you to set up a Facebook developer account to ad features to your Facebook page or ads. Creating a developer account is free and takes only a few seconds.
- Go to developers.facebook.com.
- Log in with your Facebook account.
- Click on “Create Developer Account”.
And you’re done.
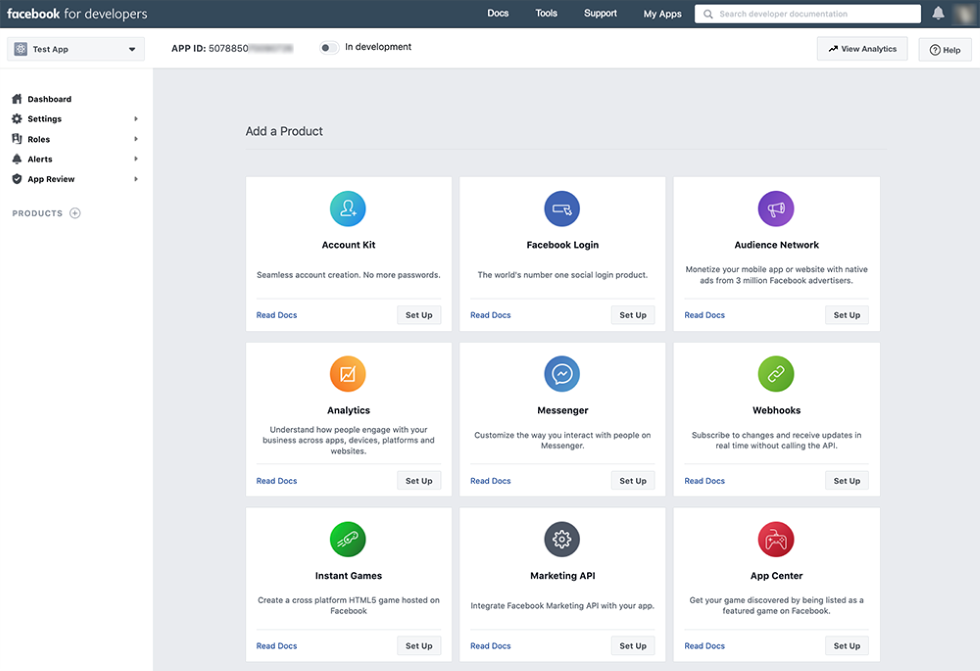
6. Create a Facebook application.
You may also need to create a Facebook application for some third-party tools or to do certain things with your app. Again, this is free to do and takes only a few seconds.
- Go to developers.facebook.com.
- Log in with your Developer account.
- Click on “My Apps” and then on “Add New App”
- Name your new app.
- You’ll be brought into the dashboard where you can begin the integration of your new app.
After this is done, you’ll want to go to your App Dashboard and go to settings.
In the “Basic” settings area:
- Fill out your app’s Display Name, Namespace, and Domain.
- Enter the URLs to your app’s Privacy Policy and Terms of Service.
- Upload your logo as a 1024×1024 pixel ‘App Icon’
- Choose a category for your app and its “Business Use”.
- Select the Business Manager account you’ll be managing the app ads from.
- Complete the Data Protection Officer contact information form.
- Specify which platforms you’ll be delivering your app on.
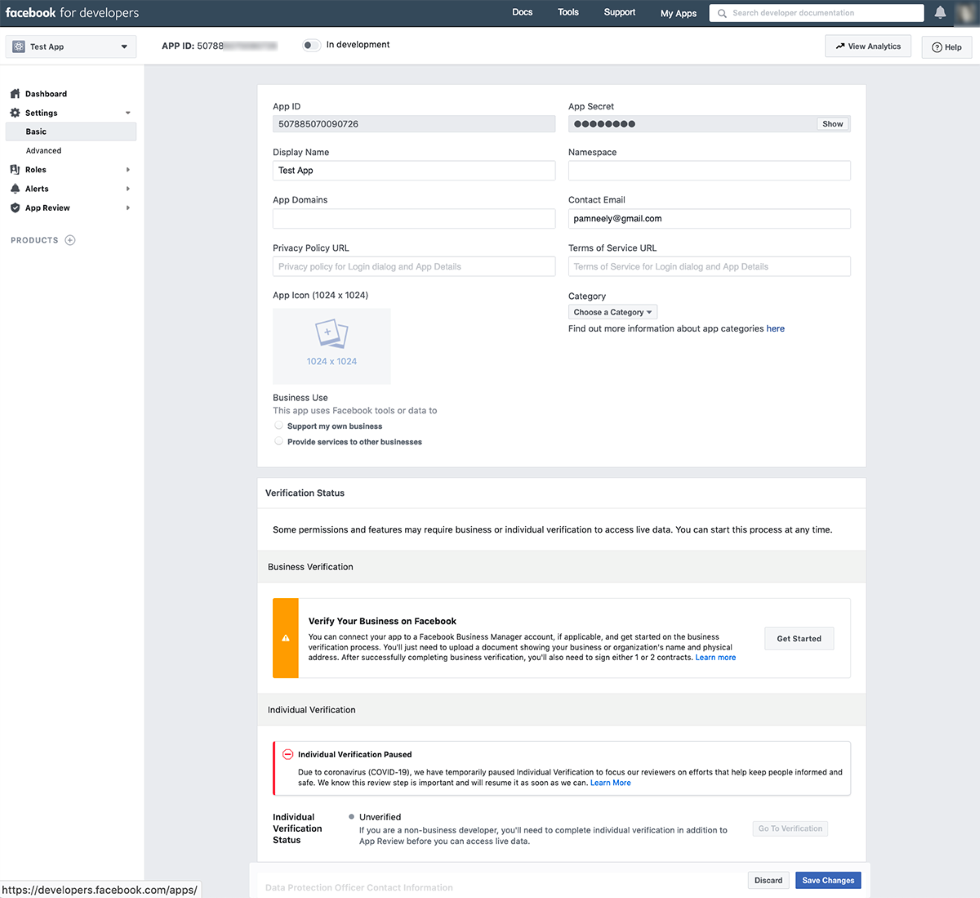

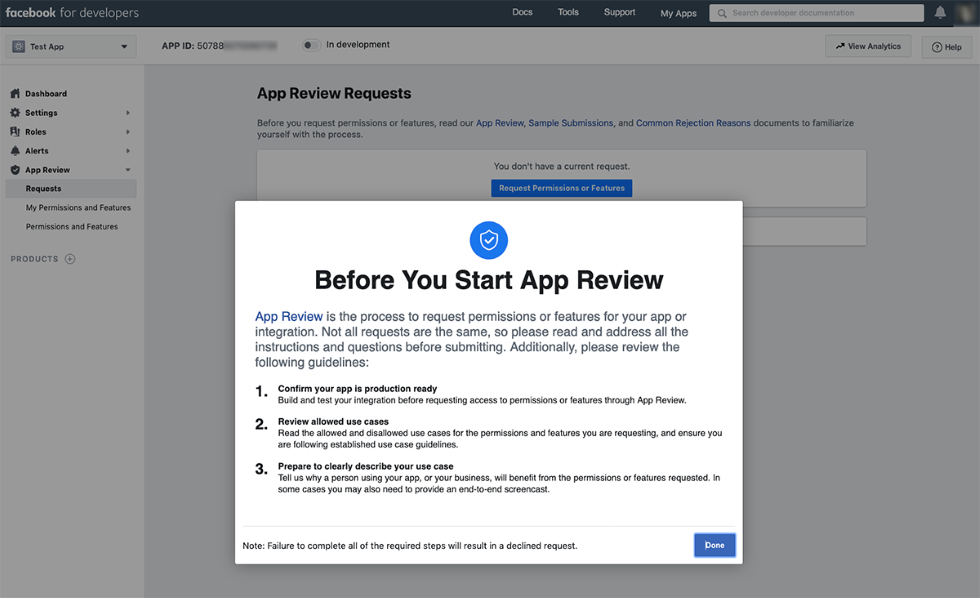
Finally, submit your app for review, paying close attention to what information Facebook expects you to include in your request.
- Set up the Facebook SDK (Software Developer Kit) with your app and activate App events.
Facebook’s SDK lets you pass app event data from your app to Facebook. This allows you to accurately track and measure the actions people take in your app, and it allows you to use app event data to optimize your Facebook Ads campaigns in powerful, lucrative ways.
You’ll set up SDK in your App Dashboard (where you just filled out the Basic and Advanced settings). To begin, go to the Settings > Basic page and scroll down to platforms. You’ll be setting up an SDK for each platform your app will use.
Facebook’s instructions for implementing the SDK on each available platform are here. That page also includes the official Facebook guides for all of Facebook SDKs. Setting up an SDK is a fairly technical task – for example, in iOS, you’ll be using the Swift Package Manager to set up a development environment in Xcode. It’s a job best left to a developer or a mobile app advertising service or agency.
Congratulations. You’ve got the functional elements of Facebook’s advertising platform set up, whether you’re a new advertiser for a local business, or you’re launching a new app to a global market. But it’s still not time to start boosting posts or creating videos. Before you spend a dime on advertising, we recommend you think carefully about your creative strategy.